
Commercial free since 1962! Home of the random obscure movie reference and occasional news from a unique perspective.
The stars at night are big and bright...

The stars at night are big and bright...
Friday, July 31, 2015


Monday, July 27, 2015
They're (BELLLLCH) Baaaaack!
Season 2 of Rick and Morty kicked off last night on Adult Swim. Ain't no party like a Rick and Morty party. Because a Rick and Morty party is multidimensional!
Tuesday, July 21, 2015
Hacker Remote Control
Own a late model vehicle? You want to pay close attention to this story from Wired. Especially if it's a Chrysler product.
Here's a few interesting bits from the story:
I WAS DRIVING 70 mph on the edge of downtown St. Louis when the exploit began to take hold.This is pretty spooky stuff when you realise everything with an IP address is vulnerable and everything that's connected to the internet has an IP address. What if North Korea hackers send out a full throttle/no brakes command? Millions of people could be killed or seriously injured instantly.
Though I hadn’t touched the dashboard, the vents in the Jeep Cherokee started blasting cold air at the maximum setting, chilling the sweat on my back through the in-seat climate control system. Next the radio switched to the local hip hop station and began blaring Skee-lo at full volume. I spun the control knob left and hit the power button, to no avail. Then the windshield wipers turned on, and wiper fluid blurred the glass.
As I tried to cope with all this, a picture of the two hackers performing these stunts appeared on the car’s digital display: Charlie Miller and Chris Valasek, wearing their trademark track suits. A nice touch, I thought.
The Jeep’s strange behavior wasn’t entirely unexpected. I’d come to St. Louis to be Miller and Valasek’s digital crash-test dummy, a willing subject on whom they could test the car-hacking research they’d been doing over the past year. The result of their work was a hacking technique—what the security industry calls a zero-day exploit—that can target Jeep Cherokees and give the attacker wireless control, via the Internet, to any of thousands of vehicles. Their code is an automaker’s nightmare: software that lets hackers send commands through the Jeep’s entertainment system to its dashboard functions, steering, brakes, and transmission, all from a laptop that may be across the country.
Miller and Valasek’s full arsenal includes functions that at lower speeds fully kill the engine, abruptly engage the brakes, or disable them altogether. The most disturbing maneuver came when they cut the Jeep’s brakes, leaving me frantically pumping the pedal as the 2-ton SUV slid uncontrollably into a ditch. The researchers say they’re working on perfecting their steering control—for now they can only hijack the wheel when the Jeep is in reverse. Their hack enables surveillance too: They can track a targeted Jeep’s GPS coordinates, measure its speed, and even drop pins on a map to trace its route.
Miller and Valasek say the attack on the entertainment system seems to work on any Chrysler vehicle with Uconnect from late 2013, all of 2014, and early 2015. They’ve only tested their full set of physical hacks, including ones targeting transmission and braking systems, on a Jeep Cherokee, though they believe that most of their attacks could be tweaked to work on any Chrysler vehicle with the vulnerable Uconnect head unit. They have yet to try remotely hacking into other makes and models of cars.
So Miller has a cheap Kyocera Android phone connected to his battered MacBook. He’s using the burner phone as a Wi-Fi hot spot, scouring for targets using its thin 3G bandwidth.
A set of GPS coordinates, along with a vehicle identification number, make, model, and IP address, appears on the laptop screen. It’s a Dodge Ram. Miller plugs its GPS coordinates into Google Maps to reveal that it’s cruising down a highway in Texarkana, Texas. He keeps scanning, and the next vehicle to appear on his screen is a Jeep Cherokee driving around a highway cloverleaf between San Diego and Anaheim, California. Then he locates a Dodge Durango, moving along a rural road somewhere in the Upper Peninsula of Michigan.
Thursday, July 16, 2015
Tuesday, July 14, 2015
Monday, July 6, 2015
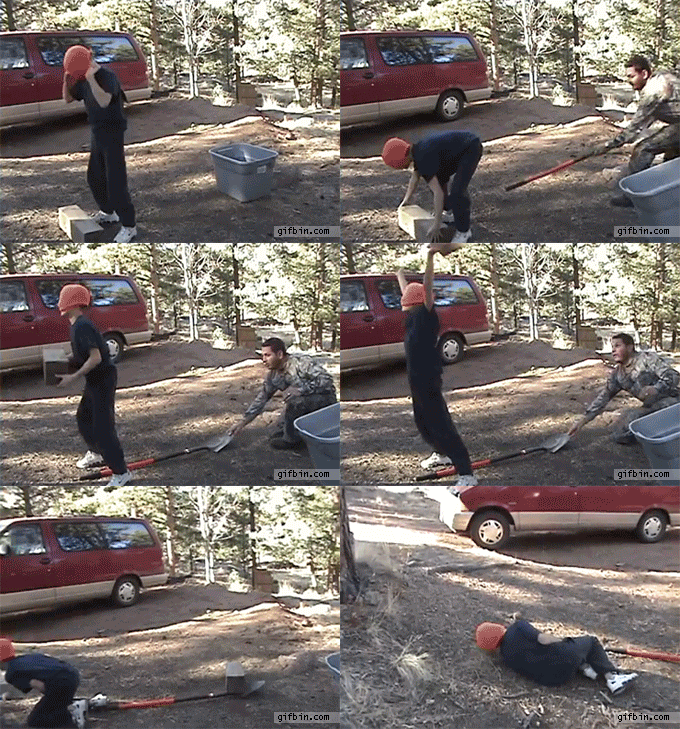
Holy S#*t!
Scary wreck at the finish of the Firecracker 400 at Daytona. Stunned to see Austin dillon walk away.

Saturday, July 4, 2015






Monday, June 22, 2015
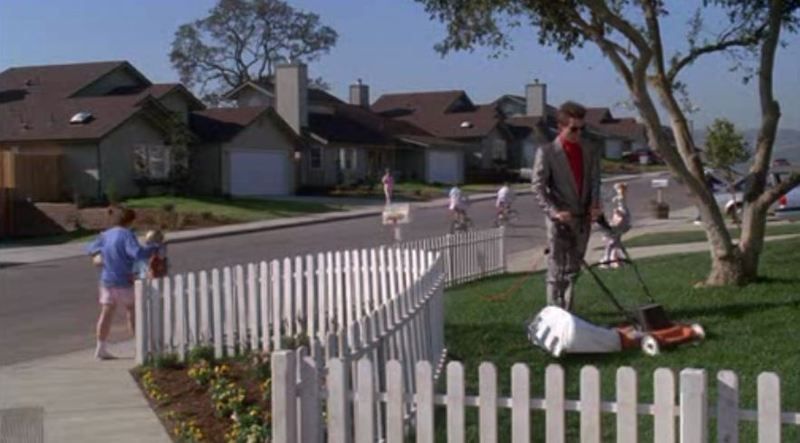
What a day for a mow, eh?
It finally dried up enough for me to cut hay. And it was damn beautiful hay if I do say so myself!
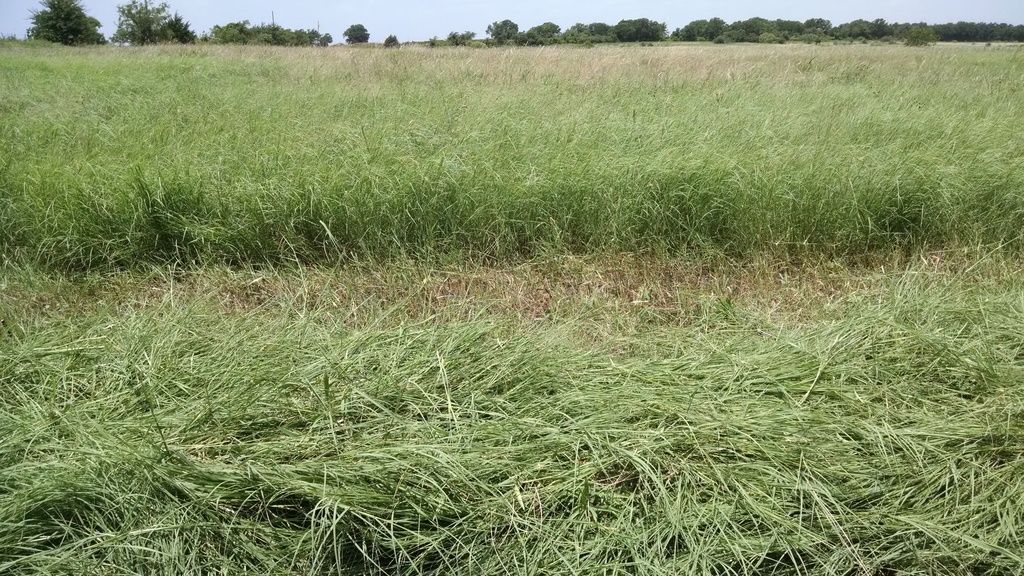
Not much to use for a visual reference, but it was over knee high and so thick I clogged the swather a couple of times. Had to pull the wads of grass out of the conditioner rollers to get it going again.
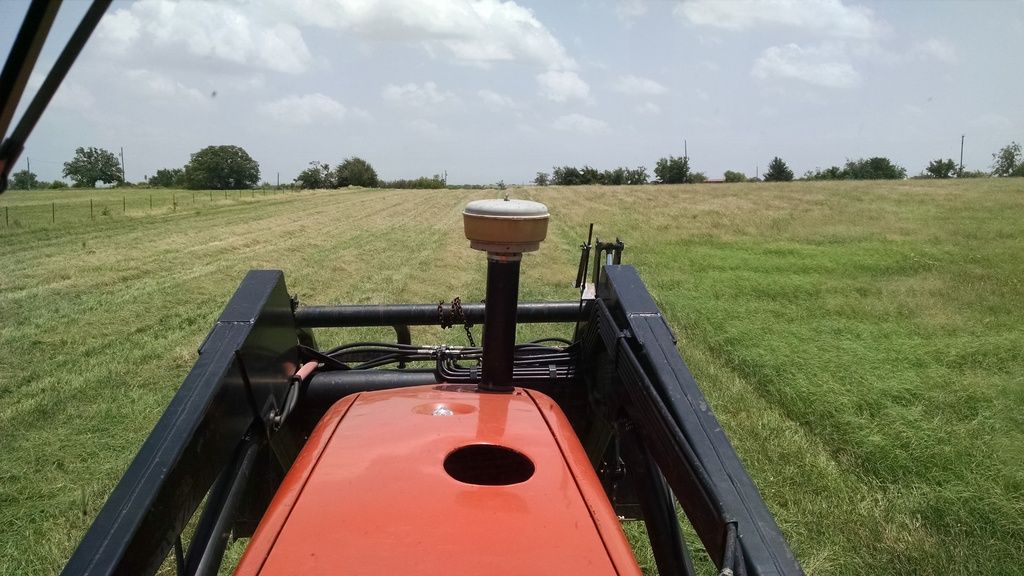
Other than that it was relatively event/breakdown free. I did have to retighten the new wobblearm bolt when I stopped for lunch, but that took about 5 minutes. The a/c worked like a champ as did the A-C.

Friday, June 19, 2015
And they (OK, I) said it couldn't be done...
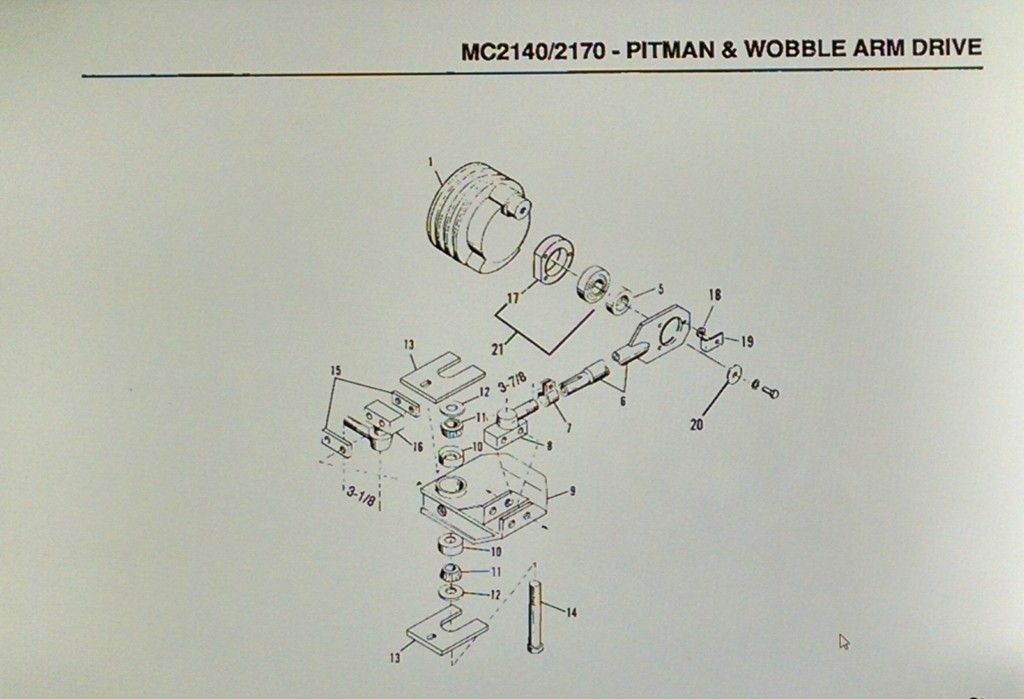
I promised you we'd be dealing with the Gehl (pronounced Gale) swather today and I did. The last time I ran it after installing new belts, it sounded like a rock crusher/auto wrecker and was making more metal shavings than hay. No bueno.
Today I broke out my tools and started taking things apart. I have to say I wasn't enthusiastic about being able to fix it, metal shavings are usually a sure sign of death around old equipment. Disassembling everything went relatively quick thanks to my air tools. If you don't have any, get some. Even cheap air tools are better than box wrenches and ratchets.
It didn't take long to see what the problem was. The large bolt that acts as an axle for the wobble arm (appropriately named) was stripped and flopping around. The loose bolt led to the bearings disintegrating. The cotter pin holding the stripped nut in place was grinding away as the bolt flopped around and leaving the metal shavings I saw.
I called the salvage yard I bought some parts from before and I guess they were going to make up for the bargain I got before. The guy wanted $80 + shipping for the bolt. F that.
Instead I took a trip to Bridgeport Automotive and rummaged through their stock. Lo and behold, not only did they have the right bolt, they had several hardness grades for me to choose from. I picked a Grade 10 and several other assorted nuts, carriage bolts and washers I needed. I was batting .1000!
Then came the stumbling block, the bearings. We measured with calipers but the bearings wouldn't slide past the threads. I bought the nuts and bolts then tried Purvis for the bearings. I hate going there because they are high as heck and I call the counter guy Marlboro Man. When I walked in the door it smelled like he'd smoked at least a pack today. (I know, Ex-smokers are the worst about complaining about smokers.) They had the same result, wouldn't slide past the threads, but Marlboro Man had already billed me for the bearings before he got them out. I took them anyway, went to B&R Machine Shop and had the bolt run on a lathe to smooth out any ridges. VOILA! The bearing slid right on!
Back to the South 40, a few sweat soaked minutes knocking out the old bearing races and installing new ones then reassembling the wobble arm and I was done. I cranked up the tractor and gave it a test run. It was MUCH quieter and no longer sounded and felt like it was going to fly apart at any second. I think the old girl has at least one more season of hay cutting left in her. I guess we'll find out tomorrow if it's dry enough, because I'm seriously behind schedule on cutting hay.
Next up, getting the round baler field ready!
Thursday, June 18, 2015
I picked a good day for sniffing glue.

I pieced the styrofoam back together and shipping taped the fool out of it, then remeasured, marked and double checked my marks. This time I had it right and proceeded to trim the styrofoam.
Next, I pieced together the carpet and managed to get it completely covered. The beauty of a black carpet mosaic is everything matches. A healthy coat of spray glue on the insulation and another on the ceiling and we're ready to go!
Much to my surprise, it fit the first try and it made a firm bond. I decided to push my luck and fit the 3 trim pieces that go around it, There is a constant 2 1/2 inch gap, but each section is a different length to accommodate for lights, ect. I knew I had enough foam and carpet but wasn't sure about glue. I had to spray the carpet, both sides of the styrofoam and the cab interior. I may have gone a tad overboard with the top section. The cab did get a little foggy.
The interior Gods were smiling upon me and I managed to get all 3 pieces fabricated and installed before running out of glue right as I finished. It doesn't look laser cut, professional. But it looks a heck of a lot better than it did before.
Tomorrow's episode: The Swather! Part Deux
Tuesday, June 16, 2015
Victory is Mine!

It was a good day on the South 40. I figured out the problem with the a/c compressor on my Allis Chalmers. I installed the new compressor only to run into a slight problem. It wouldn't circulate freon. I was getting equal pressure readings on both the suction and discharge side. The compressor was turning, but nothing was getting cold. It read 90psi both sides.
I double checked everything and it was hooked up right. Just wasn't compressing. I took it off and carried it back to APE in Haltom City off 121 where I had it rebuilt. They tested it and said everything worked. It looked to them like I didn't add enough oil. I put in 8oz like the counter guy told me and one of the older guys spoke up and said those old style A6 Frigidaire compressors took at least 12oz. So back to the shop, fill with 12oz of PAG46 bolt it back up as fast as I can before the rain started and pulled a vacuum.
I left it overnight to see if there was any leaks and it was still -35psi this morning. A very good sign. I put the vacuum pump back on for a couple of hours to pull any moisture out of the lines. Moisture removal is the main reason for pulling a vacuum on a refrigeration system before charging.
After a couple hours on the pump, I started adding R-134a. Well, I tried to add R-134a but it still wouldn't take any on the suction side. I was stumped. I called APE back and talked to the tech again. He said I did everything right and it should work. Should being the keyword here. I double checked everything one more time ( more like a quadruple check) and I pushed in on the suction side quick connect. The gauge jumped! What have we here? I pressed in again and saw bubbles in the sightglass. It was taking freon.
It was the Schrader valve on the suction side of the compressor. For some odd reason it would let me pull vacuum, but wasn't letting anything in. After adding a can and a half, I started the engine. Lo and behold, it was circulating. I added another 3 cans (4 1/2 total and) and it was blowing icicles!

I was so pleased with myself I decided to get up on the roof and try to find the leak that's been the bane of my existence. I installed a metal roof on top of the shingles a couple years ago. It was fine for a while but I started seeing signs of leakage on the ceiling. I resealed all the vents with asphalt, but was still getting leaks.
After slathering another fresh coat on top of everything, I quadruple checked my work. Then I noticed a couple pieces of foam insulation were missing at the top where the cap covers the sheets (thank you, squirrels). I think the wind was blowing rain thru the holes, above the top end of the sheet metal and running back down the corrugation to the original leak. So I really hadn't stopped the leak, just given it a much longer path. A healthy dose of asphalt in the gap and hopefully, problem solved.
2 for 2? Not quite. There was a pretty big let down today.
While pulling the vacuum on the tractor, I looked through Craigslist for a hay cutter and found a really nice one only a few years old that was listed just 16 minutes ago and priced at $1000. Early bird gets the worm, that's Garage Sale cheap! If everything was in good shape it was worth around $8,000. Their preferred method of contact was text so I sent one asking where it was and if everything worked. After several minutes they texted me back and said yes, everything worked and it was in Bowie. I texted back and asked if I could see it. I waited a few minutes but no reply.
I decided to go ahead and call instead of waiting on the text. A girl answered and I told her I was the one who had texted her about the cutter. "I've got it sold." It had been listed less than half an hour. That's what I get for texting. Should have went ahead and called while I was still the early bird. I have been trying to convince myself there was something seriously wrong with it because it was so cheap.
Oh well, at least I'll be enjoying a frosty cool tractor cab. Victory is indeed mine.
Monday, June 15, 2015
Wednesday, June 10, 2015
Measure twice, Cut once
I almost have everything up and running. Swather is all repaired and the tractor is only waiting on an expansion valve which should be here today. So I turned my attention to some minor things like the missing headliner and insulation in the cab.
I had a piece if 1/2" styrofoam insulation left over from my pumphouse and a small bit of automotive carpet from my minitruck. It was just enough to do the job, but barely. I took my time measuring. 39" at the front, 33" at the back, 25" long. To be sure, I measured again. 39, 33, 25.
I mark the insulation and remeasure my marks. 39, 33, 25. I cut the styrofoam 39 x 25. All I have to do now is subtract 3" off each side and I'll have my angles. This stuff is easy!
Next I pull out the carpet and spray glue. It's like the stuff Elwood used on the RV in The Blues Brothers... strong stuff! I have to mosaic a few pieces of carpet but I got the whole thing covered and it looked damn good if I do say so myself.
I take my masterpiece out to the tractor, scrape the roof well to remove any remnants of the old headliner and give it a good coat of spray glue. Next I spray the back of the insulation when... wait a second... I cut 3" off each side alright. But it was the wrong #^@%ing side! I had it turned the wrong way when I measured the cut. Instead of narrowing it Left to Right, I narrowed it Front to Rear on the Left side. The piece is completely useless and I just wasted all my spare insulation and carpet.
(Insert colorful sailor language soliloquy here)
Maybe the saying should be "Measure twice, double check your layout, cut once". I was damn proud of that headliner, too. It looked marrr-velous.
It sure would have been nice to have a fully insulated cab with a brand new a/c. I may stick it up there anyway until I can afford a laser cut cab kit. It won't fit right, but it would cover most of the exposed metal and make a big difference. It would also look redneck as hell.
Update: The expansion valve finally arrived after 5 and I deferred installation until after 7 when the big ol' shade tree was making a big ol' shade. I didn't want to waste that shower I took earlier. I quickly installed the expansion valve and hooked up the vacuum pump.
Much to my chagrin, it wouldn't hold a vacuum. I double checked all the connections on the expansion valve and dryer. They were all tight. I pulled another vacuum and as soon as I turned off the pump it lost everything. Then I thought about double checking the lines on my gauges and sure enough one wasn't tight. A quick twist and problem solved.
I'm letting it pull vacuum overnight and charging it in the morning. It should blow icicles while I'm cutting hay. It would have been really cool with a new headliner, too.
I had a piece if 1/2" styrofoam insulation left over from my pumphouse and a small bit of automotive carpet from my minitruck. It was just enough to do the job, but barely. I took my time measuring. 39" at the front, 33" at the back, 25" long. To be sure, I measured again. 39, 33, 25.
I mark the insulation and remeasure my marks. 39, 33, 25. I cut the styrofoam 39 x 25. All I have to do now is subtract 3" off each side and I'll have my angles. This stuff is easy!
Next I pull out the carpet and spray glue. It's like the stuff Elwood used on the RV in The Blues Brothers... strong stuff! I have to mosaic a few pieces of carpet but I got the whole thing covered and it looked damn good if I do say so myself.
I take my masterpiece out to the tractor, scrape the roof well to remove any remnants of the old headliner and give it a good coat of spray glue. Next I spray the back of the insulation when... wait a second... I cut 3" off each side alright. But it was the wrong #^@%ing side! I had it turned the wrong way when I measured the cut. Instead of narrowing it Left to Right, I narrowed it Front to Rear on the Left side. The piece is completely useless and I just wasted all my spare insulation and carpet.
(Insert colorful sailor language soliloquy here)
Maybe the saying should be "Measure twice, double check your layout, cut once". I was damn proud of that headliner, too. It looked marrr-velous.
It sure would have been nice to have a fully insulated cab with a brand new a/c. I may stick it up there anyway until I can afford a laser cut cab kit. It won't fit right, but it would cover most of the exposed metal and make a big difference. It would also look redneck as hell.
Update: The expansion valve finally arrived after 5 and I deferred installation until after 7 when the big ol' shade tree was making a big ol' shade. I didn't want to waste that shower I took earlier. I quickly installed the expansion valve and hooked up the vacuum pump.
Much to my chagrin, it wouldn't hold a vacuum. I double checked all the connections on the expansion valve and dryer. They were all tight. I pulled another vacuum and as soon as I turned off the pump it lost everything. Then I thought about double checking the lines on my gauges and sure enough one wasn't tight. A quick twist and problem solved.
I'm letting it pull vacuum overnight and charging it in the morning. It should blow icicles while I'm cutting hay. It would have been really cool with a new headliner, too.
Monday, June 8, 2015
We now return to The Wonderful World of Farming!
When we last left South 40 Farms I was waiting on drive belts for my Gehl swather. They arrived this afternoon and I jumped righ to getting them reinstalled. I knew this was going to be tough, but I had no freaking idea.
I put the belts on then heaved the gearbox into position. It was 110% effort Coach, I swear! It was full effort for 20 minutes in the blazing sun and 0 wind. It wasn't cooperating at all. First my straw hat became saturated with sweat. Then it started to drip off the brim. When the drip turned to a steady stream I cried "calf rope" and headed for some cold lemonade and a/c.
It was time to call in reinforcements. BIL was out of town and I rely on him too much as it is. So I decided to call my good friend Sam and beg him to bail me out. Fortunately he was home and had just finished a project in his shop. He came over and I laid out the situation to him.
We fought and struggled for at least half an hour in the blazing sun (I really need to build an awning over the work area). Then Sam started thinking about removing more stuff to get the gearbox in place. I nixed that quick, because it came out in 1 piece, it WILL go back in the same way. During this period of alternative discussion, the rake drive belt was moved 'out of the way'. Stay tuned sports fans.
It's hot, the space is tight, nothing is cooperating and both of us are close to losing our temper when suddenly.... it slips right in place! I scramble to get one of the bolts in the shaft bearing so it can't slip. VOILA!
Except for the rake drive belt that got moved to the wrong side of the driveshaft. It has to go under, not over. We have to take it apart.
I called timeout and we headed for shade and Gatorade. As we cooled off and rehydrated Sam agreed there was no freaking way I was ever going to get that belt on by myself and whoever designed this piece of machinery need to be hung with a very itchy rope.
We took the bolt out of the shaft bearing and lowered the gearbox, moved the belt to run below the shaft then tried to lift it back again. To both our amazement, it slipped right into place somehow on the first try! I scrambled to find the carriage bolt. Where the &%$# is it? Sam's screaming "Put in the bolt! Put in the bolt!" I looking everywhere then I remember there are 2 more in the box I put all the nuts, bolts, ect in when I took things apart. I find a bolt, Get it in the hole, then scurry under the swather to get the nut on.
SUCCESS! It's all downhill from here!
Replace the other 2 carriage bolts on the shaft bearing, the 4 bolts in the top of the gearbox, replace belt and chain tensioners, reconnect the Pitman drive and the main driveline. All that took about 10 minutes.
Let me tell you, Bud Light never tasted so good. I knew I put a fridge in the shop for a reason. Now I'm waiting on the dryer and expansion valve for my tractor a/c (C'mon FedEx, WTF?). I have a reman compressor I picked up from APE, but I'm not installing it until I get the rest of my parts. Then we see how long everything holds together.
Now if you'll excuse me I need some Motrin and herbal therapy for my aching back.
I put the belts on then heaved the gearbox into position. It was 110% effort Coach, I swear! It was full effort for 20 minutes in the blazing sun and 0 wind. It wasn't cooperating at all. First my straw hat became saturated with sweat. Then it started to drip off the brim. When the drip turned to a steady stream I cried "calf rope" and headed for some cold lemonade and a/c.
It was time to call in reinforcements. BIL was out of town and I rely on him too much as it is. So I decided to call my good friend Sam and beg him to bail me out. Fortunately he was home and had just finished a project in his shop. He came over and I laid out the situation to him.
We fought and struggled for at least half an hour in the blazing sun (I really need to build an awning over the work area). Then Sam started thinking about removing more stuff to get the gearbox in place. I nixed that quick, because it came out in 1 piece, it WILL go back in the same way. During this period of alternative discussion, the rake drive belt was moved 'out of the way'. Stay tuned sports fans.
It's hot, the space is tight, nothing is cooperating and both of us are close to losing our temper when suddenly.... it slips right in place! I scramble to get one of the bolts in the shaft bearing so it can't slip. VOILA!
Except for the rake drive belt that got moved to the wrong side of the driveshaft. It has to go under, not over. We have to take it apart.
I called timeout and we headed for shade and Gatorade. As we cooled off and rehydrated Sam agreed there was no freaking way I was ever going to get that belt on by myself and whoever designed this piece of machinery need to be hung with a very itchy rope.
We took the bolt out of the shaft bearing and lowered the gearbox, moved the belt to run below the shaft then tried to lift it back again. To both our amazement, it slipped right into place somehow on the first try! I scrambled to find the carriage bolt. Where the &%$# is it? Sam's screaming "Put in the bolt! Put in the bolt!" I looking everywhere then I remember there are 2 more in the box I put all the nuts, bolts, ect in when I took things apart. I find a bolt, Get it in the hole, then scurry under the swather to get the nut on.
SUCCESS! It's all downhill from here!
Replace the other 2 carriage bolts on the shaft bearing, the 4 bolts in the top of the gearbox, replace belt and chain tensioners, reconnect the Pitman drive and the main driveline. All that took about 10 minutes.
Let me tell you, Bud Light never tasted so good. I knew I put a fridge in the shop for a reason. Now I'm waiting on the dryer and expansion valve for my tractor a/c (C'mon FedEx, WTF?). I have a reman compressor I picked up from APE, but I'm not installing it until I get the rest of my parts. Then we see how long everything holds together.
Now if you'll excuse me I need some Motrin and herbal therapy for my aching back.
Surprisingly, NOT Decatur
For a handicapped person, she seemed to be highly mobile. The other woman is in the running for Mother of The Year.
Sunday, June 7, 2015
Remember Kids, Don't be afraid of Officer Friendly!
When is this insanity going to stop?
This lead all the local stations and even made the CBS Evening News, McKinney P.D. sanitize white swimming pool.

And let's take a look at that sweet tactical roll by Officer Eric Casebolt who is now on administrative leave paid vacation.

He's also the Vice President of the local Police union (think he'll get any real punishment?) and a trainer at the Police Academy. That's all information that was suddenly deleted, but not quick enough. A very good report on this entire fiasco at Heavy.
Wednesday, June 3, 2015
Today's dose of 'Merica! *
*Blatant theft of intellectual property from Bag Of Nothing.
Since I don't make one red cent off of this (and we all know how much a penny is worth) I don't think this technically invalidates my commercial free status. If you disagree... Why don't you support the troops?
They must think I'm an Aggy.
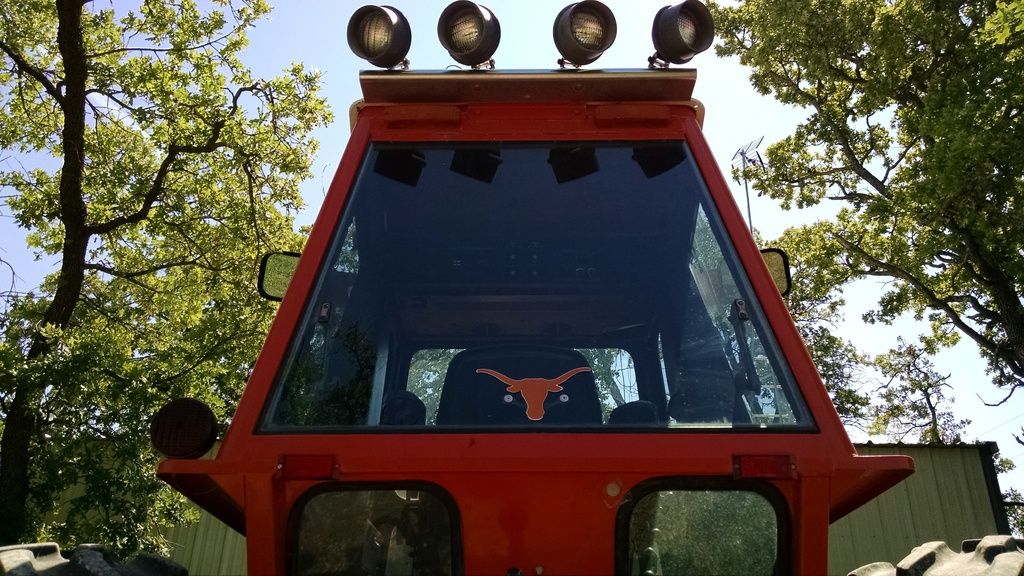
Riiiiiiight.
The chain idler bolt refused to come out. I beat on it as hard as I dared (didn't want to bend it) with a 2lb sledge, used a pry bar and it managed to make it slide down enough to work the chain off the sprocket, but the bolt refused to come out. Removing the 3 bolts on the bearing was no easier. they were carriage bolts inserted backwards. The nuts were hidden on the inside of the swather above the conditioner rollers and the rake. If I did my best contortionist impression I could reach the carriage heads with a finger to hold it in place while I removed the nuts. Putting them back is going to be fun.
The gearbox still was wedged in tight. I was afraid to try too hard to get it out for fear of it coming free and 120lbs of steel gearbox crashing down on my foot, but it finally slid out and I got the drive belt off.
Since I'd gone this far I knew I might as well replace the rake drive belt next to it because I'm not going thru this procedure again for maybe ever. As my luck would have it there was 1 bolt preventing me from removing it. All I needed was half an inch clearance. Tried removing the bolt, but there was a skid plate preventing that from happening. I was ready to start using an acetylene wrench but a few "SERENITY NOW!!!" and I decided to push my luck and try wedging the pulley with a prybar without bending it at the same time. I think I was successful. Time will tell. Either way, I got the belts off.
I'd called around using the parts numbers I had and found an OEM belt at Hendershot in Decatur for $185 + shipping. No way, Jose. I had stopped by Purvis Industries in Bridgeport yesterday but they wouldn't sell me a belt unless I brought it in. The guy made a big deal about it being some sort of special belt when I showed him a parts drawing. Honestly, the guy didn't know what he was talking about, in my opinion and he was pretty pompous about it. Smoking a cigarette at the counter didn't help his customer service rating, either.
Last night I found a belt online for $23 that I thought was the right belt, but I wasn't 100% sure. When I took the belts in to Purvis today Marlboro Man said they would order them and be in tomorrow, I asked how much it would be and he said he wouldn't know. That's when I told him what I found online and how much it was. He said there was no way that belt was that cheap and his would be 'considerably' higher. He also said I told him they wanted $185 for it yesterday. It was pretty clear what was going to happen here. He was going to order a $30 belt and charge me just under $185 because he knew the other price. I told him to give me the belts back and I'd get them online. Just because I'm a farmer does NOT mean I'm an Aggy.
That was the best move I made all day.
I called V-Belt Supply.com and these guys know their stuff. We took measurements of belt length, width, pulley dimensions, ect and they found the exact belt I needed for the application. With shipping it came to $43. That was higher than I originally thought, but not 'considerably' especially since I hadn't figured in shipping. It was certainly 'considerably' cheaper than $185 + shipping Hendershot wanted and however much Purvis was going to break off in me.
Now I get to kick back put my feet up and sip on a cool adult beverage for 2 days while FedEx does the heavy lifting so to speak. Then I get to try and reassemble the whole mess. I'll be saving a few of those beverages for then.
Sunday, May 31, 2015
Just one of my typical days.

Saturday started out in the rain at 9am unhooking the swather from my tractor and hooking it to my F350 to tow over to my BIL's welding shop. Spent 30 minutes looking for my new $18 gloves. Finally gave up, then found them sitting on the tongue of the swather soaked like a sponge (been there all night, 3 1/2" of rain). It was a sign.
As you can see from the picture the tongue is on the left end of the swather and even in the fully retracted position it tracks FAR to the right. I get hooked up and make my way at 25mph taking up all my lane and 1/2 of the oncoming on the hilly, twisty FM road cheating death and dodging idiots not paying attention all the way. About a mile out of Alvord I see one of the old rotten implement tires going flat. I ran over something in the ditch when I had to scoot over for a truck.
I barely make it to the County maintenance barn driveway before it rolls off the rim. I pull out my 4-way and bottle jack but for some dumbass reason I decided to clean out the bed of my truck a couple weeks ago and took all my wood blocks out. I look around and scrounge up a couple rocks to put under the jack so I can unhook then start to jack up the flat. Problem. Bottle jack is too tall to fit under the bottom of the leg and the leg is angled up for a couple feet. I need blocks to reach a safe jacking point and we've already covered that.
I leave it sitting on the side of the road and drive on over to BIL's and steal a wheel off his square baler and a shitload of blocks. We head back to the swather, pull the flat off and then he tells me it's the wrong bolt pattern (we'll revisit this point). His baler is an 8 lug and my swather is a 6, I'm going to need a tire.
I leave it again (this time sitting on blocks) take BIL home, then head to Decatur in search of a tire. I get to the tire store at 12:05 and everybody is looong gone. Same thing at McMaster New Holland. I go to Tractor Supply and the closest thing they have is a skinny front tire for a 9-N Ford (no worky). I call AgVantage and they don't even carry tires. Great farm stores ya got there.
While I'm leaning against the tailgate of my truck trying to think of somewhere I can find a tire after Noon on a Saturday I look at my wheel laying next to BIL's wheel. They are both universal and will fit either a 6 or 8 lug pattern. I should have looked for myself when he said it wouldn't fit. I head back to the swather, put the baler wheel on and finally make it to BIL's. It's 3:30 and he has to be somewhere at 4.
At least it's sitting at the welding shop and it isn't leaving until it's fixed.
Unfortunately I'll have to buy 2 new tires to get it back home.
Friday, May 15, 2015
Big Time in Hollywood, FL
If you have Comedy Central you need to set your DVR for Wednesday nights at 9:30. Big Time in Hollywood, FL is one of the most comedically brilliant things I've ever seen and yet so random I can hardly describe the premise.
The talented cast includes Stephen Tobolowsky, Kathy Baker, Michael Madsen, David Keith, Paz Vega and Cuba Gooding, Jr (as Cuba Gooding, Jr). It's led by Alex Anfanger and Lenny Jacobson as Jack & Ben, the Dolf Brothers. They are a pair of delusional brothers who are kicked out of their parents house and forced to provide for themselves.
The plan backfires when they cross paths with Cuba Gooding, Jr (played by Cuba Gooding, Jr) and become pawns in an even bigger scam. Hilarity ensues.
BTIHF is the first scripted sitcom from Comedy Central. Ben Stiller is one of the co-executive producers. It is written, directed and produced by Dan Schimpf and Rob Schrab. This show is swimming in talent on and off the screen and it shows.
Wednesday nights at 9:30 on Comedy Central.
Subscribe to:
Posts (Atom)